
Privacy by routing DNS traffic through a VPN Tunnel on a Mikrotik router
Why DNS Privacy Still Matters in 2026
Most people think that when they browse the internet using HTTPS, their online activities are completely private. Unfortunately, that is not entirely true.
HTTPS encrypts the content of your communication with a website. Your internet provider cannot see the pages you read, the forms you submit, or the passwords you enter. However, before your browser can connect to a website, it first needs to know the IP address of that website.
This is where DNS comes into play.
DNS (Domain Name System) acts as the internet’s phonebook. When you visit a website such as www.example.com, your device performs a DNS query to find the corresponding IP address.
Traditionally, these DNS queries are sent in plain text over the internet. Anyone between you and the DNS server can potentially see which domains you are looking up.
The Privacy Problem
Even when all your web traffic is protected by HTTPS, DNS requests can reveal a surprising amount of information:
- Websites you visit
- Applications you use
- Smart home devices in your network
- Streaming services you access
- Business services and cloud platforms you connect to
In many cases, DNS traffic creates a detailed profile of your online behavior.
Isn’t DNS over HTTPS the Solution?
DNS over HTTPS (DoH) is certainly an improvement.
Instead of sending DNS requests in plain text on port 53, DNS queries are encapsulated within HTTPS traffic on port 443.
This provides protection against:
- Local network snooping
- Public Wi-Fi monitoring
- Basic ISP DNS inspection
However, DoH does not make you invisible.
Your ISP can still see:
- The destination IP address you connect to
- The DNS provider you use
- Traffic patterns
- Connection metadata
Depending on the implementation, technologies such as SNI (Server Name Indication) or traffic analysis may still reveal information about the services being accessed.
In short:
DNS over HTTPS encrypts the DNS query itself, but not necessarily all metadata surrounding the connection.
A Different Approach: Route DNS Through a VPN
A stronger privacy model is to route all DNS traffic through a VPN tunnel.
In this setup:
- Internal DNS servers perform DNS lookups.
- DNS traffic is marked by the router.
- The marked traffic is sent through a WireGuard VPN tunnel.
- The ISP only sees encrypted WireGuard traffic.
- External DNS providers only see the VPN endpoint address.
This significantly reduces the visibility of DNS activity to your internet provider.
My Environment
I use:
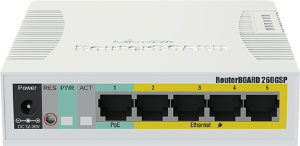
- MikroTik Router with RouterOS 7.20.6
- WireGuard VPN
- ProtonVPN (or other VPN provider)
- Multiple Pi-hole DNS servers, running on my Proxmox homelab server
The goal is simple:
Only DNS traffic should travel through the VPN tunnel.
All normal internet traffic continues to use the regular WAN connection.
This approach provides additional privacy without forcing all users and applications through the VPN.
Step 1: Create an Address List
First, create an address list containing all internal DNS servers.
| |
What does this do?
This creates a group called DNS Servers.
Instead of creating firewall rules for every DNS server individually, we can simply reference this address list.
Advantages:
- Easier management
- Better scalability
- Cleaner configuration
Step 2: Mark DNS Traffic
The next step is to identify DNS traffic generated by these servers and mark it for special routing.
UDP Port 53
| |
Explanation
This rule says:
“If traffic originates from one of the DNS servers and uses UDP port 53, mark it with routing mark to-ProtonVPN.”
UDP 53 is the traditional DNS protocol.
The parameter:
| |
means processing stops after the packet is marked.
UDP Port 853
| |
Explanation
Port 853 is commonly used by encrypted DNS technologies. This ensures those DNS requests are also routed through the VPN.
TCP Port 53
| |
Explanation
Although most DNS traffic uses UDP, larger responses may fall back to TCP.
Examples include:
- Large DNS responses
- DNS zone transfers
- Certain DNSSEC operations
This rule ensures TCP-based DNS traffic is also protected.
TCP Port 853
| |
Explanation
This captures encrypted ‘DNS of TLS’ (DoT) traffic using TCP on port 853.
Again, the traffic receives the routing mark and is directed toward the VPN.
TCP Port 443
| |
Explanation
This is the rule that captures DNS over HTTPS (DoH).
Most DoH providers use HTTPS over TCP port 443.
Because the traffic originates from the DNS servers in our address list, we can reasonably assume this HTTPS traffic is DNS-related and should be sent through the VPN.
This prevents DNS-over-HTTPS requests from bypassing the privacy tunnel.
Step 3: Create a Dedicated Route
Now we create a routing table that uses the WireGuard tunnel.
| |
Explanation
This route says:
“When traffic arrives with routing mark to-ProtonVPN, send it through the WireGuard interface wg2-ProtonVPN.”
Only marked traffic uses this route.
All other traffic follows the normal routing table.
This is what makes selective VPN routing possible.
Step 4: Routing Rule
| |
Explanation
This rule tells RouterOS to perform a route lookup in the to-ProtonVPN routing table whenever packets carry the routing mark to-ProtonVPN.
On modern RouterOS versions, routing marks and routing tables often work directly together without requiring additional routing rules. Depending on your RouterOS design and version, this rule may not be necessary.
Always test routing behavior after enabling or disabling routing rules.
What Does My ISP See?
Without this setup:
| |
The ISP can observe DNS traffic and metadata.
With this setup:
| |
The ISP only sees:
| |
The DNS requests themselves travel inside the VPN tunnel.
This significantly improves privacy.
Final Thoughts
Privacy on the internet is not a single technology.
HTTPS protects website content.
DNS over HTTPS protects DNS queries.
WireGuard protects traffic between your router and the VPN endpoint.
By combining these technologies and routing DNS traffic through a dedicated WireGuard tunnel on MikroTik RouterOS, you create multiple layers of privacy.
The result is a simple but effective setup:
- Internal DNS servers remain local.
- DNS traffic is encrypted.
- DNS traffic is hidden from the ISP.
- Normal internet traffic can continue using the regular WAN connection.
For home labs and privacy-conscious MikroTik users, selective DNS routing over WireGuard offers an elegant balance between privacy, performance, and simplicity.